Brian Design
CREATED BY
31:36
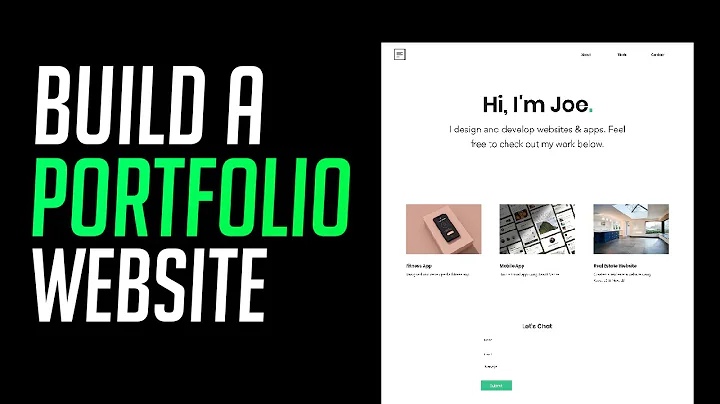
How to Make a Portfolio Website using Editor X Content Manager
How to Make a Portfolio Website using Editor X Content Manager
Hey everyone! We have an exciting challenge for you today – creating a minimalistic portfolio website design without any coding! But first, a huge shout-out to Editor X for sponsoring today's video which is all about how you can easily create your own stunning portfolio website using their intuitive Content Manager. Let's dive in!
As a part of our monthly NoCode Design Challenges at Live Learning Editor X, we also offer mentoring on building design businesses and furthering your career. If you're interested, drop by our website and join the community of designers!
A Glimpse of What We'll Be Creating
Your portfolio is the soul of your online presence; it showcases your skills, projects, and expertise. A well-crafted portfolio website can do wonders for your career. With the Editor X Content Manager, we'll be designing a minimalistic and easy-to-use portfolio that's perfect for anyone looking to showcase their work.
Here's a sneak peak at what we'll make:
- A simple slide animation that greets users upon entering the site
- A sleek projects section to showcase your work, complete with user-defined URLs for each image
- Seamless navigation with smooth scrolling between site sections
- A functional contact form that sends data to a backend database for easy reference
Exciting, right? Let's get started on creating this masterpiece!
Starting Your Editor X Project
Before we really dive in, make sure you have an Editor X account. Once that's done, head over to your dashboard and create a new project. You can start with a blank canvas or choose from their various templates if you'd like a starting point.
Designing the Animation
Firstly, let's create our slide animation that will appear when users load the site. With Editor X, this is a breeze. Simply click on the "Add" button in the toolbar and navigate to the animations section. Choose the one that suits your style, and then customize the settings as desired. You can tweak everything from the duration, delay, and looping.
For this example, we're choosing a simple slide-in animation to give our website a soft and elegant entrance. Once you're satisfied with your animation, simply add it to your site and adjust the positioning as needed.
Creating the Projects Section
Next, we'll create the core of our portfolio – the projects section. With the Editor X Content Manager, go to the "Add" button in the toolbar and select the "Projects" section. The projects list should now be visible, and you'll see how easy it is to add new projects or edit existing ones.
For each project, you can add an image and a custom URL pointing to a more detailed description of the project or even an external website where the project is hosted. You can also organize your projects into categories to make it easier for your visitors to navigate your different types of work.
Smooth Scrolling Navigation
To improve the overall user experience, we're adding a smooth scrolling effect to navigate between the various sections of our portfolio site. This is super simple with Editor X!
Firstly, assign anchors to each of the sections you want to be scrollable. To do this, click on the section you want to assign an anchor to and choose "Add Anchor". Then, name the anchor in the properties panel.
Next, link each anchor to the relevant menu items. For example, if you have a menu item called "Projects", link it to the projects section's anchor. Voilà! Now, when a user clicks on a menu item, the site will smoothly scroll to the corresponding section.
The Contact Form and Backend Database
Finally, let's create a functional contact form that sends data to a backend database for easy reference. With Editor X's built-in forms, you can set up a contact form with just a few clicks.
Go to the "Add" button in the toolbar and choose the "Form" section. Adjust the form fields as needed – you might want to include name, email, and message fields.
Now, to create the backend database, navigate to "Content Manager" on the left-hand side of the editor. Create a new collection for your contact form submissions, with fields corresponding to each form field you have in your contact form (i.e., name, email, message). Be sure to give the necessary permissions for visitors to submit the form.
Next, link your form to the database by selecting your form and clicking on "Connect to data" in the properties panel. Choose your created database collection, and map each form field to the corresponding database field. With this, when a user submits the form, their details will be saved in the database for you to review later.
Wrapping It Up
And there you have it – a sleek and minimalistic portfolio website that is easy to navigate and showcases your brilliant work. The best part? You did this all without a single line of code, thanks to Editor X's Content Manager!
Don't forget to join our community at Live Learning Editor X for more exciting design challenge opportunities, plus access to helpful resources and mentoring on building your design business and career!


Join over 5,000+ people learning, helping each other to scale their freelance/design business, taking no-code challenges, collaborating, talking about their projects, and more!
Join Designers & Creatives From All Over The World!

More Like This #Tag
Brad Hussey | Freelancing As A Web Designer & Creating Online Courses That Sell (Passive Income)
Editor X TV | With Brandon Groce
1:12:35


