Tutorials by Manizha & Ryan
CREATED BY
10:42
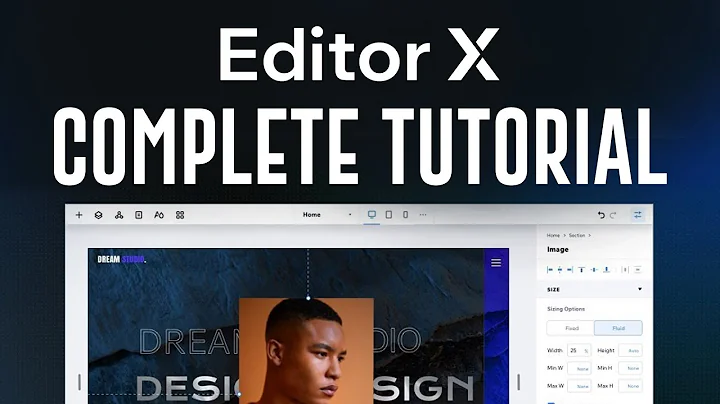
Editor X Tutorial: How To Use Wix Editor X In 2023
Editor X Tutorial: How To Use Wix Editor X In 2023
Hey there, design enthusiasts! Are you looking to create a stunning new website without the hassle of coding? Well, you're in luck. In today's blog post, we'll be walking you through an amazing no-code platform, Wix Editor X, with a step-by-step tutorial on how to use it in 2023.
This tutorial is brought to you by the lovely team at Live Learning Editor X, your go-to destination for both beginners and pros who want to learn how to build design businesses and further their careers. Besides offering monthly no-code design challenges with awesome prizes, Live Learning Editor X provides mentoring and resources to help you level up your design skills without breaking a sweat. So be sure to check them out and join their thriving community!
Now, without further ado, let's dive into the world of Editor X!
Getting Started with Wix Editor X
For those of you who aren't aware, Editor X is a powerful no-code website builder affiliated with Wix, one of the leading website creation platforms. This means that any site you create with Editor X will also be displayed on Wix's platform.
To get started, simply head over to Editor X's website and click on "Start Now." You'll be prompted to sign up for an account. The sign-up process is pretty straightforward, and you can choose to continue with your Google account if you don't want to create a separate email and password.
Once you're logged in, you'll be asked to provide some basic information about yourself — whether you're a student, freelancer, or part of an organization. This helps Wix Editor X cater to your specific design needs. Click "Get Started" to proceed.
Choosing a Template
Editor X provides a wide range of professionally designed templates to choose from, depending on the category you've selected during the sign-up process. You can explore these templates and choose one that best suits your project's requirements.
If you prefer to start from scratch, you also have the option to select a blank canvas and build your website without using any pre-designed templates. This offers you more freedom and flexibility to create a unique site that reflects your brand's identity.
Scroll through the available templates and click on the one you'd like to use. A preview of the template will appear, and you can browse through the sample pages to get a feel for how your site might look.
Customizing Your Website Design
Now that you've chosen a template, it's time to start personalizing your website. Wix Editor X offers a drag-and-drop user interface that allows you to easily modify the elements on your site.
1. Header and Footer: To edit your website's header and footer, hover your cursor over the corresponding section and click the pencil icon that appears. This will open the header or footer design panel, where you can add, modify, or delete items like navigation menus, logos, and social media icons.
2. Background: To change the background color or image of any section, click the paintbrush icon that appears when you hover over that section. You'll then have the option to select a different color, apply a gradient, or upload an image.
3. Text and Fonts: When it comes to text, simply click on any text box to start editing its content. You'll also have access to a text settings panel where you can choose from numerous fonts and styles, adjust the size and spacing, and even add drop shadows or other effects.
4. Images and Videos: To replace or add images, click on the image placeholder or use the "Add" button in the left-hand menu, then select "Image." Upload an image from your computer, or browse the wide selection of stock images provided by Wix. Similarly, you can insert videos by selecting "Video" from the "Add" menu and either uploading your own video or pasting a URL from YouTube or Vimeo.
5. Buttons and CTA: Personalize your call-to-action (CTA) buttons by clicking on them and choosing from various design options like size, shape, and color. Remember that your CTA buttons should stand out, so consider using a contrasting color for them.
Adding Functionalities with Wix Apps
One of the things that make Wix Editor X so powerful is the wide range of apps that can easily be integrated into your website design. With their App Market, you can add features like contact forms, galleries, sliders, and more. Just click on the "Apps" option in the left-hand menu and search for the specific app you need.
Previewing and Publishing Your Website
Once you've finished designing your website, it's time to see how it looks on different devices. Use the "Preview" button found at the top of your editor screen to switch between desktop, tablet, and mobile views.
If you're satisfied with your website, it's time to hit the "Publish" button! You'll be prompted to choose a domain (either a custom domain or a free Wix subdomain). Once you've made your choice, your website will go live, and you can start promoting it to the world.
Pricing Plans
Although Wix Editor X offers a free version with basic features, there are various paid plans that provide enhanced functionality, including a custom domain, more storage, and support for e-commerce (if you are looking to set up an online store). Be sure to evaluate the different pricing plans to determine which one best fits your needs.
Wrapping Up
Wix Editor X is an incredible tool that allows you to design stunning websites without any coding knowledge. We hope this tutorial has given you a good understanding of how to use Wix Editor X in 2023.
Remember, if you ever need more assistance, Live Learning Editor X is here to help with their mentorships, resources, and monthly no-code design challenges. Don't forget to join their community and take your design skills to the next level! Happy designing!


Join over 5,000+ people learning, helping each other to scale their freelance/design business, taking no-code challenges, collaborating, talking about their projects, and more!
Join Designers & Creatives From All Over The World!

More Like This #Tag


